
Let’s be honest: buying an electric vehicle is the fun part. But then you get home, look at the standard wall outlet in your garage, and realise the "fueling" part of the equation is going to be painfully slow.
You need a Level 2 charger. You know this. But the moment you Google "how to install a level 2 charger," you’re hit with a wall of confusing forums, scary warnings about high voltage, and conflicting advice about permits.
Here is the good news: Installing a high-speed home charging station doesn't have to be a headache. In fact, with the IYILO Level 2 charger, you have two distinct paths you can take. One is a simple afternoon project; the other is a permanent power upgrade.
In this guide, we are going to walk you through exactly how to get your IYILO charger up and running, whether you are a plug-and-play type of person or someone looking for maximum hardwired power.

The "Pre-installation" Check (Don’t Skip This)
Before you even unbox your new IYILO charger, check your electrical panel. This is the metal box full of switches, usually in your garage or basement.
You are looking for two things:
- Space: Do you have room for a new "double-pole" breaker? This takes up two slots, just like an electric oven or dryer breaker.
- Capacity: Does your home have enough spare power? If you have a 100-amp service and you’re already running a hot tub, central AC, and an electric range, you might need a "service upgrade."
Pro Tip: If you are unsure, snap a photo of your open panel and text it to a local electrician. They can usually tell you in five seconds if you’re good to go.

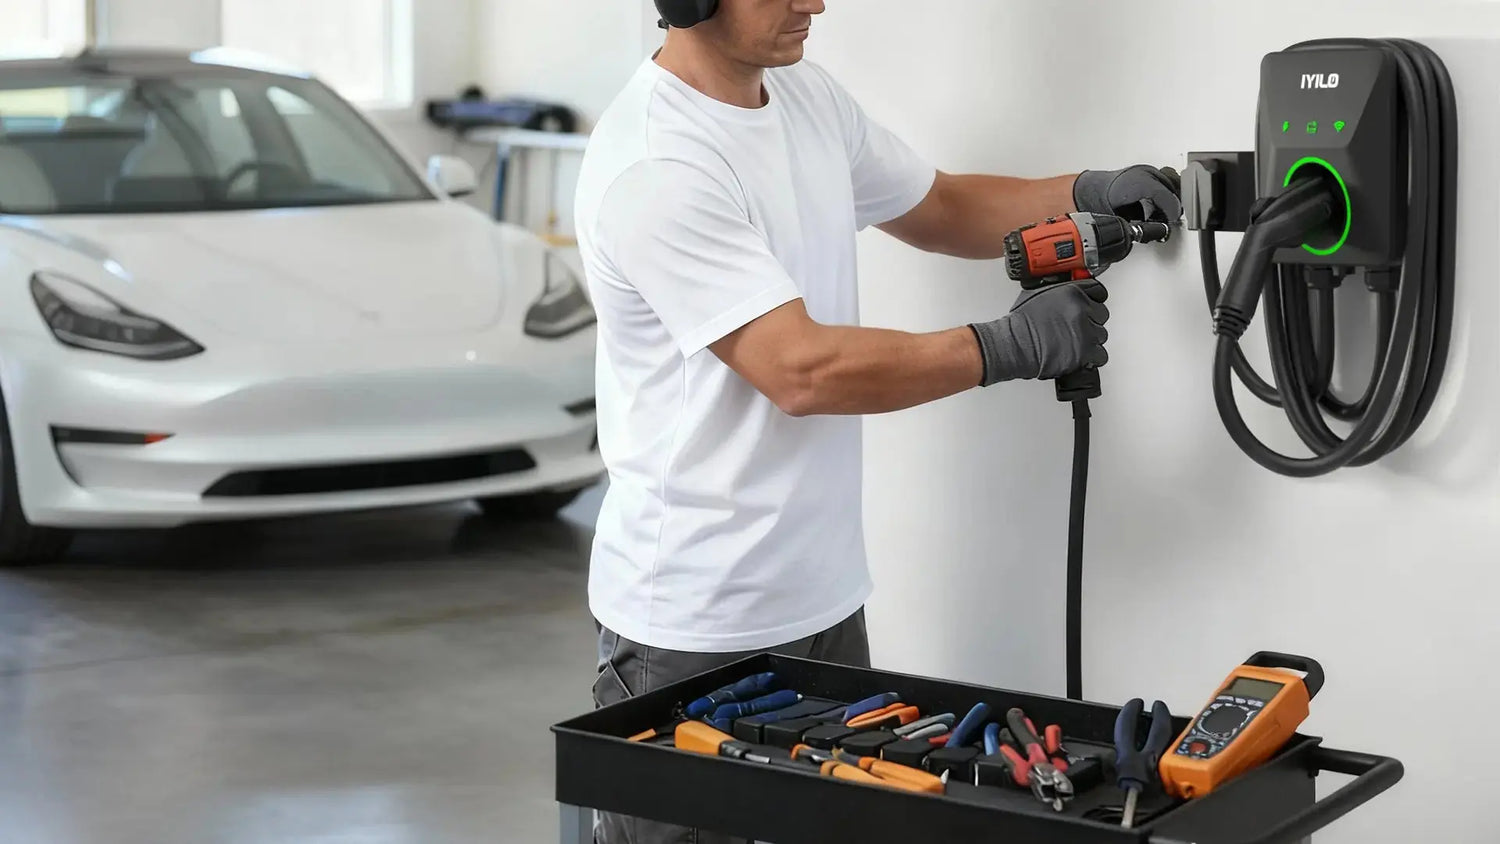
Option A: The "Plug-in" Installation (The 40Amp)
This is the route 90% of our customers choose because it is fast, flexible, and requires minimal downtime. The IYILO Level 2 charger comes ready out of the box with a NEMA 14-50 plug-in 40A. This is the industry standard for high-power appliances.
How to do it:
- Install the Outlet: If you don’t already have a NEMA 14-50 outlet (a 240V receptacle) in your garage, hire an electrician to install one.
- Why hire a pro? They will run the correct gauge wire (usually #8 AWG copper) and ensure it meets your local building codes. This is a quick job for a pro, usually taking just a few hours.
- Mount the Bracket: The IYILO package includes a wall-mounting bracket. Find a stud in your wall near the outlet. Use a stud finder—don't guess. Secure the bracket using the included screws.
- Hang and Plug: Slide the charger onto the bracket until it clicks securely. Then, simply plug the NEMA 14-50 connector into your new outlet.
- Safety Check: The IYILO charger features a "ready" light. Once plugged in, it will run a self-diagnostic.
The Result: You are now charging at 40 amps (9.6kW). That’s about 38 miles of range per hour. For most drivers, this is more than enough to wake up to a full battery every single day.
Option B: The "Hardwired" Installation (The 48Amp)
This is for the power users. If you want the cleanest look (no visible plug) and the maximum possible speed, you want to hardwire IYILO Level 2 charger.
One of the best features of our unit is its flexibility. You can easily convert the plug-in model to a hardwired model to unlock the full 48 amps (11.5kW) of charging power.
The Process:
Note: Unless you are a licensed electrician, we strongly recommend hiring a professional for this specific task, as it involves working with live wires.
- Remove the Plug: The electrician will open the IYILO unit and disconnect the NEMA 14-50 input cable.
- Run the Conduit: Instead of a plug, the wires will run through a protective conduit directly from your panel into the bottom of the charger. This looks sleek and professional.
- Upgrade the Wiring: To handle 48 amps continuously, your electrician needs to use wire rated for a 60-amp breaker.
- The Secret Step (The DIP Switch): This is the most important part that amateurs often miss. Inside the IYILO charger, there is a physical switch (a rotary dial or DIP switch) on the mainboard. This must be adjusted from the "40A" setting to the "48A" setting. This tells the charger's brain that it is safe to pull more power.
The Result: You are now charging at 11.5kW. This is the maximum speed allowed for most Level 2 home chargers, perfect for large-battery trucks or SUVs.
Location Matters: Garage vs. Driveway
Where should you install it? Many people assume it has to be inside the garage. But what if you park in the driveway?
We built the IYILO Level 2 charger with a NEMA 4 enclosure rating. In plain English, this means it is weatherproof. It is sealed against rain, snow, dust, and sleet. You can mount this charger on the exterior wall of your house or on a pedestal in your driveway without worrying about the elements.
Installation Tip: If mounting outdoors, just make sure the charging cable (a generous 25 feet) can reach your car's port without creating a tripping hazard across your walkway.
The Final Step: Get Smart
Once the hardware is on the wall, don't forget the software. The "install" isn't done until you've connected the charger to your Wi-Fi.
Download the IYILO App and follow the pairing instructions. Why? Because this is how you save money. The app allows you to schedule your charging. You can plug your car in at 6 PM, but tell the charger to wait until midnight when electricity rates are cheap. Without the app, you're just paying premium prices for no reason.
Summary: Safe, Fast, and Flexible
Installing a Level 2 charger is the single best upgrade you can make for your EV experience. It changes "range anxiety" into "range confidence."
Whether you choose the simplicity of the NEMA 14-50 plug or the raw power of a hardwired connection, the IYILO Level 2 charger is designed to adapt to your home and your needs. It’s built to safety standards (ETL certified) that let you sleep soundly while your car fuels up for tomorrow's drive.
Ready to get started?
0 comments